ВНИМАНИЕ! График работы на майских праздниках: Офис в Москве: 9 мая ВЫХОДНОЙ!
Офис в СПБ: 1 мая, 9 мая - ВЫХОДНОЙ!
Engine Removal/Installation
AWARNING
• Make sure jacks and safety stands are placed properly and hoist brackets are attached to the correct positions on the engine.
• Make sure the car will not roll off stands and fall while you are working under it.
CAUTION:
• Use fender covers to avoid damaging painted surfaces.
• Unspecified items are common.
• Unplug the wiring connectors carefully while holding
the connector portion to avoid damage.
• Mark all wiring and hoses to avoid misconnection.
Also, be sure that they do not contact other wiring or
hoses or interfere with other parts.
1. Disconnect the battery negative terminal first, then the positive terminal.
2. Remove the radiator cap.
AWARNING Use care when removing the radiator cap to avoid scalding by hot coolant or steam.
3. Raise the hoist to full height.
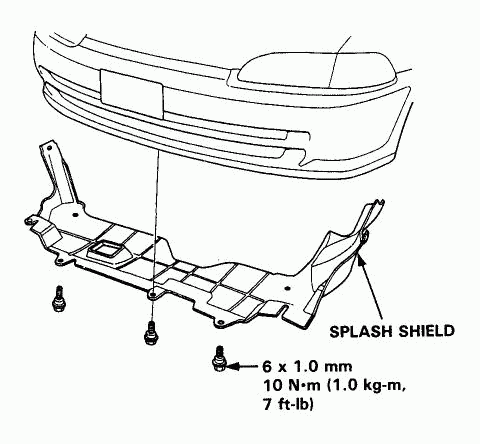
4. Remove the front tires/wheels and the engine splash shield.
5. Drain the coolant (see Section 10).
• Loosen the drain plug from the radiator lower tank.
6. Drain the transmission oil/fluid. Use a 3/8" drive socket wrench to remove the drain plug. Reinstall the drain plug using a new washer.
7. Drain the engine oil. Reinstall the drain plug using a new washer.
8. Lower the hoist.
9. Secure the hood as far open as possible.
10. Remove the under-hood ABS fuse/relay box.
11. Remove the air intake hose, the resonator and the air cleaner assembly.

Принимаем:


Мы в социальных сетях:
Напишите нам:
О компании
Каталоги
Каталоги авто
Наши телефоны:
Наши реквизиты:
Политика конфиденциальности
2024, HondaWorld.
Все права защищены
Наши реквизиты:
ООО "ПартсРу"
ИНН 7713747944, КПП 774301001
ОГРН 1127746372401
ИНН 7713747944, КПП 774301001
ОГРН 1127746372401
Политика конфиденциальности
2024, HondaWorld.
Все права защищены