Windshield
Removal
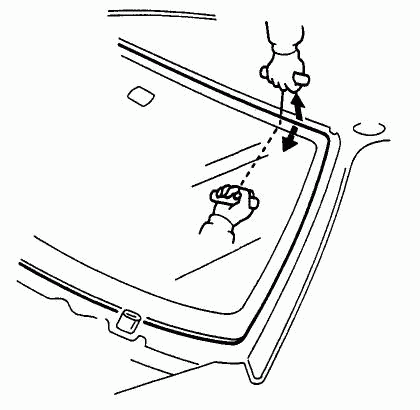
7. With a helper on the outside, pull the wire back and forth in a sawing motion and carefully cut through the adhesive around the entire windshield.
CAUTION: Hold the piano wire as close to the glass as possible to prevent damage to the body and dashboard.
8. Cut the rubber spacers away from the body with a knife; they are cemented in place.
NOTE: Replace the rubber spacers with new ones whenever the windshield is removed.
Installation
1. Scrape the old adhesive smooth with a knife, to a thickness of about 2 mm (0.08 in) on the bonding surface around the entire windshield flange.
NOTE:
• Do not scrape down to the painted surface of the body; damaged paint will interfere with proper bonding.
• Remove all traces of the rubber spacer material from the body.
• Mask off surrounding surfaces before painting.
2. Clean the body bonding surface with a sponge dampened in alcohol.
NOTE: After cleaning, keep oil, grease or water from getting on the surface.
3. If the old glass is to be reinstalled, use a putty knife to scrape off all traces of old adhesive, then clean the glass surface with alcohol where new adhesive is to be applied.
NOTE: Make sure the bonding surface is kept free of water, oil and grease.
CAUTION: Avoid setting the glass on its edges; small chips may later develop into cracks.
NOTE:
• Clean the shadowed area.
• Clean the area (6A as shown.

Принимаем:


Мы в социальных сетях:
Напишите нам:
О компании
Каталоги
Каталоги авто
Наши телефоны:
Наши реквизиты:
Политика конфиденциальности
2024, HondaWorld.
Все права защищены
Наши реквизиты:
ООО "ПартсРу"
ИНН 7713747944, КПП 774301001
ОГРН 1127746372401
ИНН 7713747944, КПП 774301001
ОГРН 1127746372401
Политика конфиденциальности
2024, HondaWorld.
Все права защищены