ВНИМАНИЕ! График работы на майских праздниках: Офис в Москве: 9 мая ВЫХОДНОЙ!
Офис в СПБ: 1 мая, 9 мая - ВЫХОДНОЙ!
Rear Brake Caliper
Disassembly
WARNING
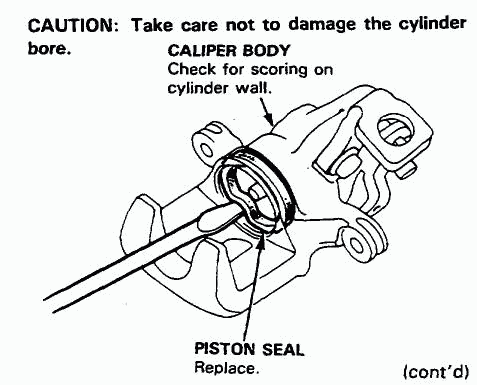
CAUTION:
1. Remove the caliper shield (see page 19-21).
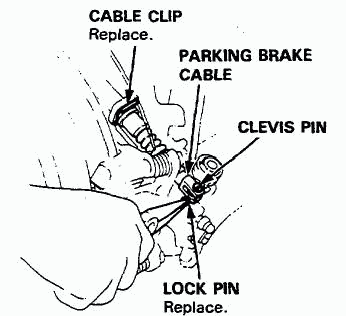
2. Remove the lock pin and clevis pin.
Remove the cable clip, and disconnect the cable from the arm.
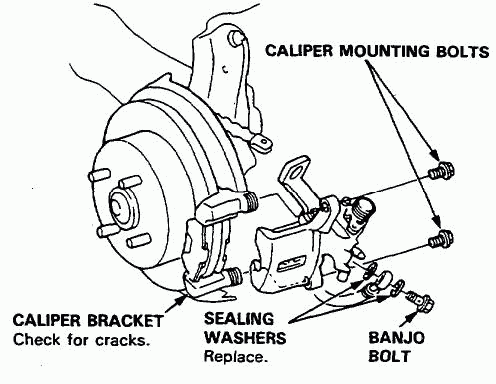
3. Remove the banjo bolt and two sealing washers.
4. Remove the two caliper mounting bolts and caliper body from the bracket.
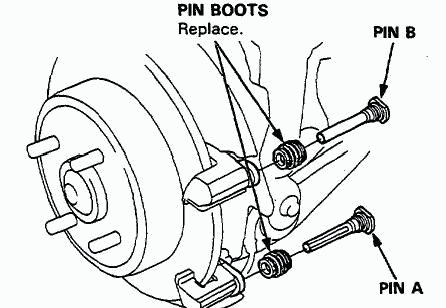
5. Remove the pins and pin boots from the caliper bracket.
6. Remove the pad spring from the caliper body.
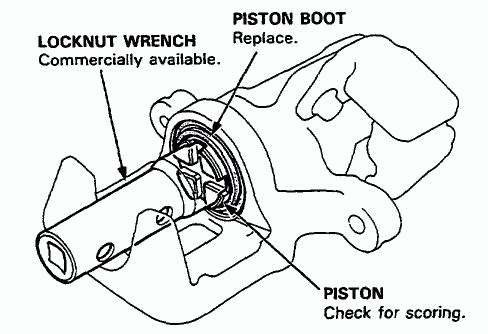
7. Remove the piston by rotating the piston counterclockwise with the special tool, and remove the piston boot.
CAUTION: Avoid damaging the piston.
8. Remove the piston seal.
О компании
Каталоги
Каталоги авто
Наши телефоны:
Наши реквизиты:
Политика конфиденциальности
2024, HondaWorld.
Все права защищены
Наши реквизиты:
ООО "ПартсРу"
ИНН 7713747944, КПП 774301001
ОГРН 1127746372401
ИНН 7713747944, КПП 774301001
ОГРН 1127746372401
Политика конфиденциальности
2024, HondaWorld.
Все права защищены


