Installation
CAUTION:
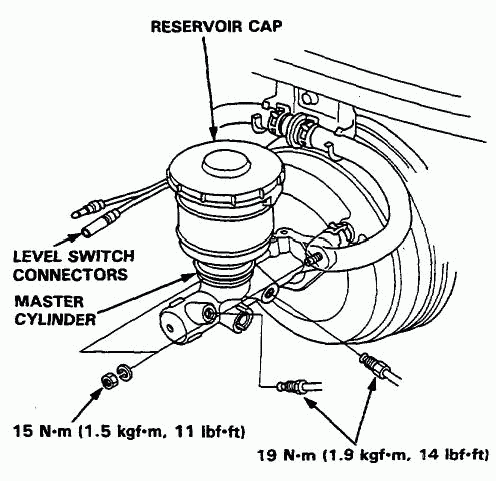
NOTE: If replacing the master cylinder or brake booster, check and adjust the pushrod clearance before installing the master cylinder. (see page 19-19).
1. Install the master cylinder on the brake booster with the mounting nuts.
2. Connect the brake pipes to the master cylinder.
3. Fill the master cylinder reservoir and bleed the brake system (see page 19-6).
4. Install the reservoir cap, and connect the brake fluid level switch connectors.

5. After installation, perform the following inspections and adjust if necessary.
Brake Booster
Inspection
Leak Test
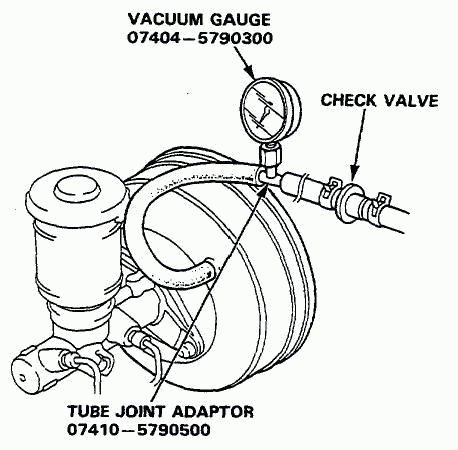
1. Install the vacuum gauge between the brake booster and check valve.

2. Start the engine, adjust the engine speed with the accelerator pedal so that the vacuum gauge readings show 40.0-66.7 kPa (300-500 mmHg, 11.8-19.7 in-Hg), then stop the engine.
3. Read the vacuum gauge.
If the vacuum reading decreases 2.7 kPa (20 mmHg, 0.8 in-Hg) or more after 30 seconds, check following parts for leaks.
CAUTION: Do not try to disassemble the brake booster. Replace the brake booster as an assembly with new one.
О компании
Каталоги
Каталоги авто
Наши реквизиты:
ИНН 7713747944, КПП 774301001
ОГРН 1127746372401
Политика конфиденциальности
2024, HondaWorld.
Все права защищены


